-->
Showing posts with label birthday. Show all posts

Thursday, June 16, 2011

A monsterously good time!

Thought I'd share a couple more monster cupcakes with you...


And now, for the craft we did during the party...Continuing on with the theme of creating your own monster, we used these Iron-ons from SEI.


Each kit has about 50 pieces, with plenty of eyes, horns, mouths, and appendages. They've got some great You tube videos showing you some techniques for creation, even a video teaching you how to make additional bodies to stretch your dollar and use all the leftover body parts. (Unfortunately I didn't find this one until AFTER the party, but that means we have lots of monster creations left for the future!) You can see some of my daughter's shirt in this pic (along with her PURPLE monstrous cupcake)...


And my son wanted to prove that the kids actually LOOKED like the monsters they created...

We found the My Own Monsters at Michael's and Hobby Lobby, but you can snag them on Amazon too!

Wednesday, June 15, 2011

Sorry I've been MIA...(pic heavy)

So, it's been a little while since I updated, and I wanted to pop in here and let you see why. My kiddos had their birthday party last week. As you might remember, we do the party at our house, and have a theme for the joint party. This year, it was monsters!


I made the invitation on my KNK. Since it's an odd size I also made my own envelopes. Unfortunately it fell outside of "normal" size for the USPS, but it was super easy to make with the Martha Stewart Scoring Board. I love the little envelope tool with that thing!


The invite is a Pop-Up card. It's a combo of printing on my laser printer and paper piecing. I love how the monsters turned out! I grabbed the good old blue Fiskars embossing plates and ran the monster bodies through the Cuttlebug with the Spellbinders tan embossing mats to add some texture (fur, scales, and ridges).

Here's the "big picture" of the cake table. My son decided he wanted the cake this year and my daughter picked cupcakes. BTW, those cute little monster cake plates (back right hand corner) are from Target. I think they're Spritz brand and were with the party supplies.


My son wanted 5 eyes on his monster cake, so after frosting the cake with the Wilton fur tip, we made cake balls (thanks for the ideas Bakerella!) and dipped them in melted chocolate then added pupils to make them look like real eyes. *NOTE* My son wanted the eyes to fan out at a bigger angle, but we found the cake balls were too heavy and the cake was too tender, so they started ripping through the layer cake if we "tipped" them too much! It was my first time making the cake pops, according to the family it shouldn't be the last, LOL!


Now, on to the cupcakes! I apologize in advance for the "purple" fur. I guess I should have actually looked at the instructions for tinting the frosting purple, but I "assumed" it would work to mix red and royal blue...well I kinda got a purplish gray! Looks like pretty boring cakes, right?


Well, the original idea for this party was sparked by some stinkin' adorable cupcakes I saw at SnowyBliss last year. That's right, the kids got to build their own monster cupcakes! The body parts were all made out of Wilton vanilla candy chips, so they were all edible too. We've got tentacles, hands, bows (there are girly monsters too, you know), and wings in this first tray.


Then there's googly eyes, teeth, horns, forked tongues,and rows of fangs in here!

The kids had a pretty good time, here's a few of their monstrous creations...


I'll share some more pics tomorrow (gotta show you the craft they did too!)


ETA: Woo-hoo! The monster cake was featured on Bakerella's Pop Stars!

Sunday, April 10, 2011

Setting sail!

I'm sure you might remember the Pirate Pop Up Card from my kiddos' birthday party last summer...well, I've finally got it packed up and available in the Paperthreads store.


Now I realize that you pirate party isn't complete without a cupcake wrapper for the mateys...after all why should the girly princesses get all the fun?

So check out this file, perfect for yer sea-farin folk!


It's already up and waiting for you at the store, so hoist the anchors and avast ye, me hearties!

Wednesday, July 14, 2010

A peak at me treasures, me hearties!

I wanted to share some of the pics from the kiddos recent "pirate party". Aaaargh, me hearties...

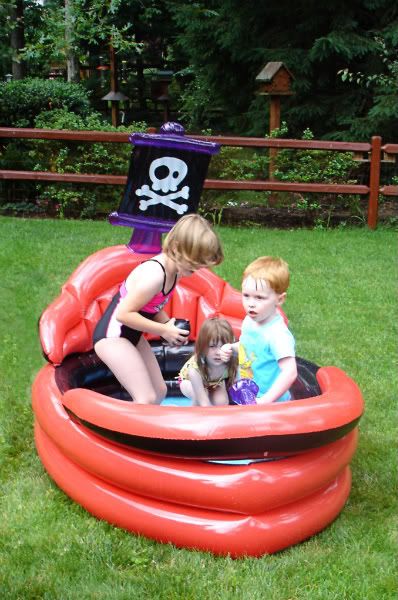
Here they are at the beginning of what turned out to be a fairly prolonged "sea battle"... (That's my DD, the 4 year old B-day girl hiding squatted down in the back...she's always very hard to get photos of.)


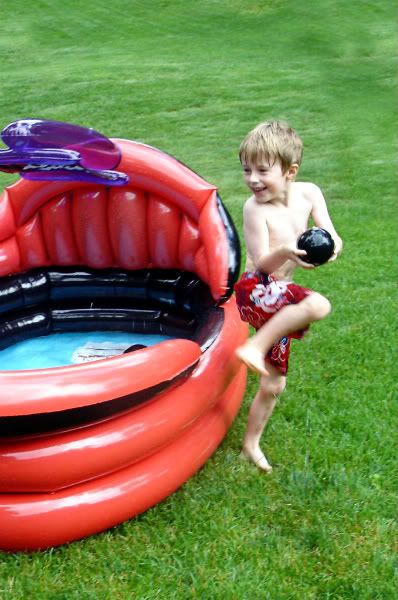
One of my DS jumping out of the pool to attack a rival pirate with his water cannonball...


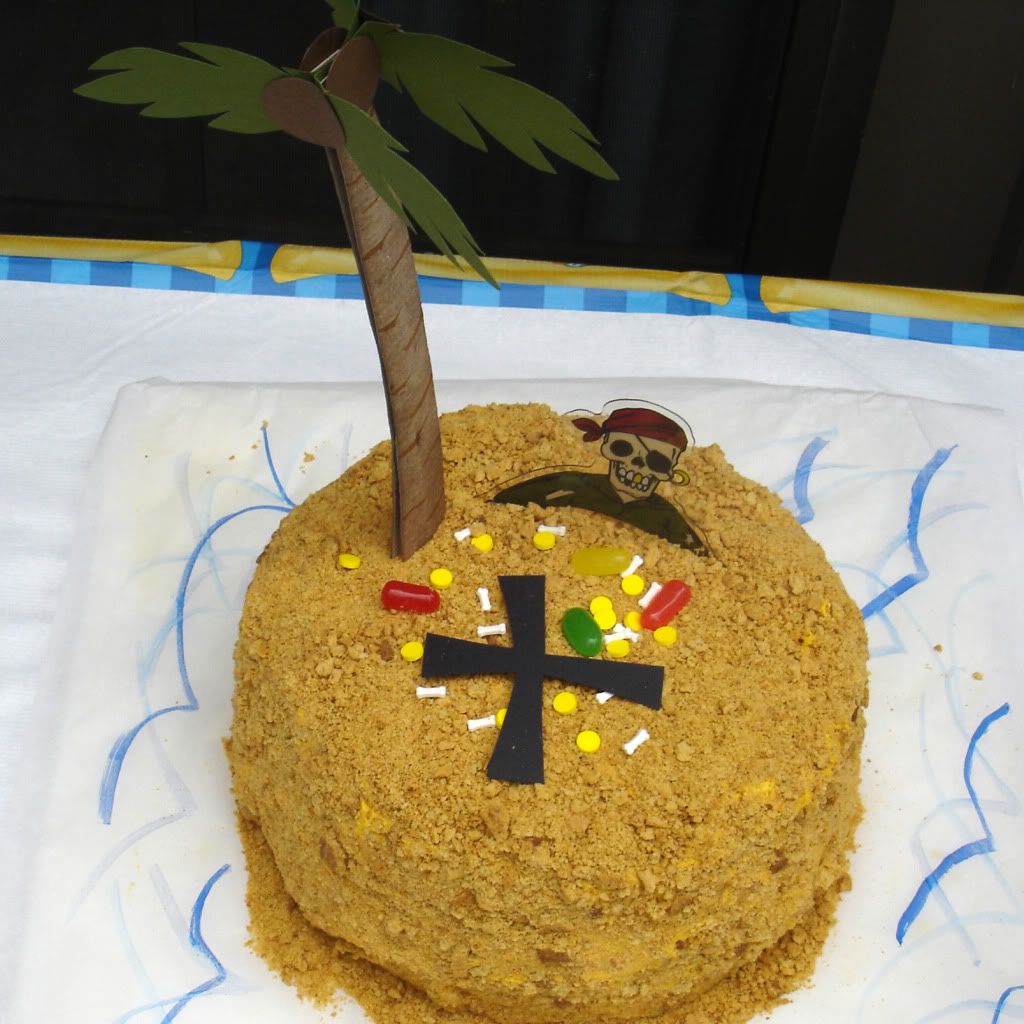
My DD's cake; it's supposed to be a desert island with buried treasure. I made a chocolate cake with a tunnel of vanilla ice cream inside, frosted with gold frosting and then sprinkled with crushed graham crackers to look like sand. Decorated the top with some cut Mike & Ikes, gold coin sprinkles, and bone shaped sprinkles. I cut the palm tree from my KNK kind of last minute that day...


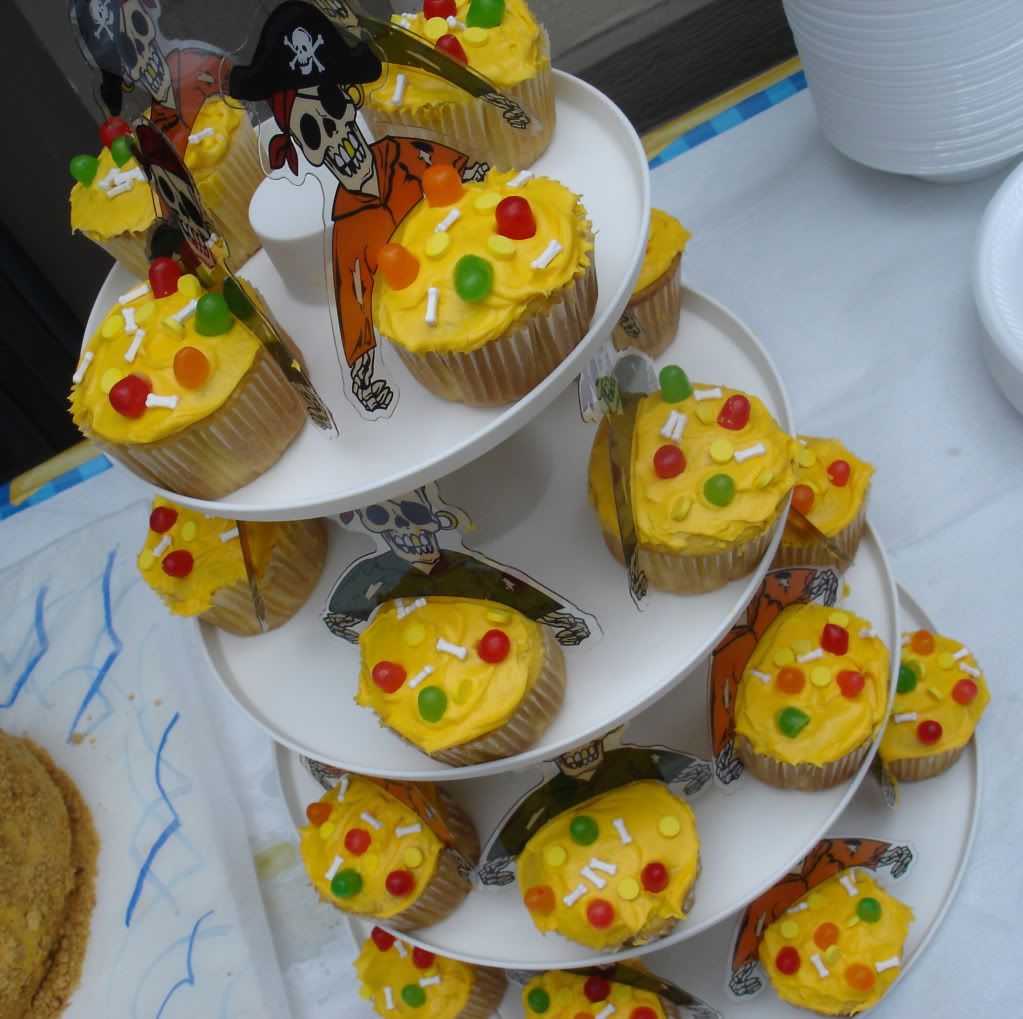
This year my DS got the cupcakes! Evil skeletons pirates clutching their buckets of gold, gems, & a few old bones!


Thursday, May 27, 2010

Avast, me hearties!

So, I'm trying to piece together some tidbits for the kiddos "pirate party" for their birthday coming up in a few weeks. You already saw the preliminary invitation...

Well, I was running to Meijer for a late night, odds'n'ends grocery stop and saw these cool (though little) inflatable kids pools. Now, since their party is in the middle of June and the weather is hot, we had already been planning on having a water balloon fight. I even found packs of all black water ballons (intended for 40th b-day parties, I guess), so they could fire "cannon balls" at each other.

But, can you believe it? I found pirate ships!


And the best part? They were clearancing them out already, so they were only $15! So, of course, I picked up two of them so they can split up into teams, load a styrofoam chest (treasure chest) up with cannon balls, and have a real out and out battle! It's a bunch of 4-6 year olds, so I think they'll have a blast!

Thursday, May 20, 2010

I've had a busy day...

I've been working on birthday invitations for my kiddos...their birthdays are only 1 day apart from each other (they'll be turning 4 and 6 this year!) Of course, everything I do seems to involve my KNK in some way, and this was no exception. I really wanted to figure out how to do a 3-D pop-up galleon that displayed when the card was opened 180 degrees...but...I had no idea where to begin, and these need to get in the mail this weekend! So, moving on...

First thing was creating the card insert, then cutting on kraft cardstock. You can see one here laying on my Martha Stewart Scoring Board (more on that later...I realized today how much I adore that thing!)


Next, I wanted to define the ship's wheel. I masked the back of the card with a scrap of paper tucked through the wheel and inked with Tea Dye Distress Ink from Ranger.


You can see now how it really lets the wheel "pop" from the background. I used my Sakura Gelly Roll gold pen to make little faux brass rings on the wheel.


Now on to the magic! Once the insert is folded and creased, I added a separate cut out skull in white cardstock over top of the kraft. You can see here a side view showing some of the depth. Now I just need to figure out how to do the outside of the card, print the details for the party, and get them into the mail!


Wednesday, July 15, 2009

Birthday Wishes!

I realized things have been so hairy this last month that I never shared with you the pics of some things I did for my kiddos birthday party. They nearly share a birth "day", so we have their party together. That means trying to come up with party themes for a older boy and a younger girl.

My DD has been going on for the last few months about "Going to a party at the castle...", it's something her toy princess phone spouts frequently! My son has his own play castle (you may have seen pics HERE before). So...we opted to go with a castle themed party.

Now, you know I can't do much without involving a cutting file of some kind, right?! I'll share some pics of the pop-up invitation later. Here are photos of my DD's cupcakes.


You can see the top layer is a bunch of princess crowns, the lower layers are made of of little castles. Here's a close-up of one.


You can find the Castle Cupcake wrapper HERE at Paperthreads.

You can find the Crown Cupcake Wrapper HERE at Paperthreads.


Monday, July 30, 2007

My daughter's first birthday party


So I had to share this pic of my layout for my DD first birthday...it is actually the first page that I completed for her album! )Please excuse the privacy "blurring" on some items. Lots of work ahead I am afraid...will I ever catch up with them?

I've gotta say though it is FUN scrapping with pink, and flowers, and butterflies!

Friday, June 8, 2007

My little sprouts are getting bigger!


So things have been very busy recently. My son turned 3 yesterday and my daughter turned 1 today! My son is so excited because EVERYONE is coming to visit. When we lived in Alaska the grandparents, uncles, and aunt couldn't visit often (and for us to get on a plane for 13 hours with two little kids - Uggh!) This file (available at Paperthreads) would be perfect for growing kids or gardening too.