-->

Wednesday, January 27, 2010

CPS challenge...

I finished another card today. This one was inspired by the sketch at Card Positioning Systems. You should check out their inspiration pieces, they're great!

The sketch for this week was CPS 151


Here's my take on the sketch...


Supplies:
Cardstock base: Georgia Pacific
Patterned paper: heidi grace designs
Scalloped edge my own design for the KNK
Figures: Cart-O-Graphics template for electronic cutters
Font: 2 Peas Piano Recital

Thanks for looking!

Tuesday, January 26, 2010

Snow, Snow, go away!


I finished the card I was telling you about using the Swiss Pixies Nora stamp. The mat is sanded Garden Gate Whitewashed Coredinations cardstock embossed with the Cuttlebug Snow Sledding words embossing folder.

Friday, January 22, 2010

Swiss Pixies - Nora

I've had some more time to play! I'll share the pics of the card once I finish it, but I got to use a few techniques on the last image I colored.


Once again, used my copics for the coloring...I need to get a few markers in the sketch form so that I can have better colors for hair. I feel kind of restricted to browns and blacks with the ciaos.

Here's the colors I used...


I used Artic Ice Stickles for her wings, hope you can see the sparkle in the photo! It's so pretty up close.


I colored over the boots with a Versamark pen once I was done shading the copics. I applied detail clear embossing powder and melted, then added a second coating. I think it gives the boots the look of wet galoshes.


I'll pop up pics when I'm done! Thanks for looking.

Wednesday, January 20, 2010

Another card creation - inspired by Mojo Monday Week 122

Today's card was inspired by Mojo Monday's Week 122 sketch. Here's the sketch it's based on...


And here's my card...I flipped the sketch on the side since all of the stamps I have are vertically oriented.


I colored in the Apple Emma (by CC Designs) with my Copic ciaos. (BTW, I think I "need" to pick up a few sketch ones too...since I don't have the colors I want for a true redhead!)


(Stamped on GP cardstock)
Hair: E35, E33, E31
Skin: E51, E50, E00
Cheeks: R11
Apples: YR31, R17, R37
Dress: YG03, YG06
Basket: E35, E33


I was pretty happy with the highlight along the crown of her hair and her shoes. I was a little at a loss as to what to do with the apron. Suggestions?

The "Kindergarten" handwriting paper is one I printed to match the copic choices in the stamp. I created the jpg, printed, and then cut the notebook edge with my KNK. The scalloped oval was also created with my KNK.

The strip of apples is glazed cardstock for me & my Big Ideas (Ellen Krans - School Days)

Oops! Just realized I forgot to add the shadow along the edge, well, I can add it later!

Friday, January 15, 2010

Swirly Flourish Card


Just another quick peek at my latest card. I had originally designsed this for a friend's wedding card, but figured I migh as well fix it up for my cutter files. I'll let you know once I finish the conversions...I am just trying to come up with the best way for print/cuts for Cricut/SCAL/MTC users.

Wednesday, January 13, 2010

January Card RAK

Okay, I finished my card (sending it for Aidan, too). Here's a look... I made my own Star Wars cardstock for the card base. Then I found some fonts for different Star Wars languages (Aurek-Besh, Yavin, and Episode 1) and typed "Awarded for Bravery" around the circle. Turned that into the center for a blue ribbon for the front and cut some gold glittery stock for the center of the new Jedi Order symbol.


I am not normally a "lumpy" card maker (oh, foo-ey! I'm not really a card maker at all!), but I HAD to make this one thick. I recreated the Medal of Yavin (SW Episode 1) and a medal with the Jedi symbol and printed them on inkjet Shrink film. They came out awesome!

I inked the back of the Yavin medal with Brillance gold ink to show through the lines I had created and give it some sparkle. I found lanyard hooks at Michael's in the jewelry section and put the shrunken pieces at the bottom. I want him to be able to use the "medals" as pulls on his jacket zipper.


Since the pulls were thicker, I created some cushioning (and the "ribbon" part of the medal) with a piece of foam board wrapped in blue paper to cover the raw edges and them a piece of blue fun foam to give it some extra space. I made a slit up the middle of each so the jacket pull could fit up inside it.

I printed a silk "pillow" to present the medals on.


Lastly, my man Aidan loves his Knock-Knock jokes and is always making up his own (they don't always make sense...but, oh well!). I made up one to be the verse inside my card...


To use the jacket pulls all he has to do is gently pull the medal piece out of the ribbon.


Monday, January 11, 2010

Just a quick note...

Yes, I am alive! Things have just been a little hairy around here is all...I did make a promise to myself to try and blog a little more regularly. It seems to be the only way I can remember what I've been doing sometimes, ba-ha-ha-ha!

So, I've been working on some cards recently. I'll have more about the card I'm working on for Aidan in the next few days...I've got some experimenting to do before I share pics with you!

Here's a little look at the card I did today.


It's a bright and cheery card. I've used my other coloring of Santa Birgitta, this time using the Red Violet copic color scheme (recipe to come later, sorry I don't have the numbers with me right now...). I also used a yellow copic to add some color to the button that was beige in a previous life, LOL!

I broke open my little DYMO handheld label maker and made the sentiment using white-core cardstock fed through as a strip, then sanded. I really liked how it looked, but it was getting smooshed as I worked on the inside, so I used the DYMO font by Manfred Klein and recreated it using the "reverse" method of generating white text.


Tuesday, January 5, 2010

January RAK at Paperthreads

For those of you who aren't aware, some of the folks at Paperthreads have been sending cards as a RAK for those in need of a little pick me up! You may have heard about this one from Shirley already, but if not...

I'm so glad I get to share the person chosen for the January feature with you! I've known Aidan for many years, but have been separated by geography. I had the great opportunity to meet back up with him this fall.

I met Aidan when he was about 4 months old. Both his parents, Don & Darii, were in the Air Force with me in Alaska. Aidan had some "birthmarks" that became more noticable over time, and was finally diagnosed with neurofibromatosis type 1 (NF-1). NF-1 is a tumor disorder caused by a gene malfunction. It is associated with bone problems, cafe au lait spots (or "birthmarks"), and occassionally causes cancer.

Aidan started having problems using the bathroom when he was about 2 1/2 years old and was diagnosed with rhabdomyosarcoma in February 2005. The bathroom problems were because his tumor was blocking his bladder. His family had to move urgently, as they didn't have the treatment centers needed for chemotherapy in Alaska. Don & Darii also found out that the baby they were carrying (Seth) had congenital heart disease and would need multiple surgeries shortly after birth, so the move needed to be somewhere with cardiothoracic surgical specialists as well. Aidan went through a year of chemotherapy, radiation, and surgery and was tumor free for almost 3 years.

He had a local recurrence of the rhabdomyosarcoma in July 2008, again making it difficult to use the bathroom. This time the surgery involved removing his bladder and forming an ostomy, then he started another series of chemotherapy which ran from July 2008 to July 2009.


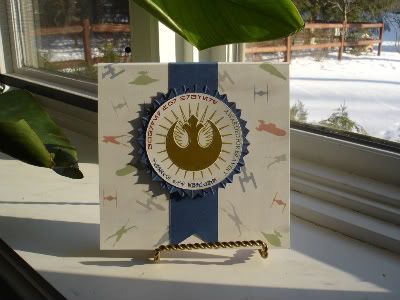
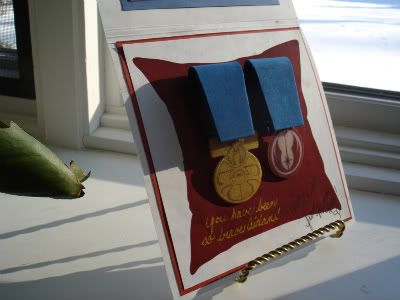
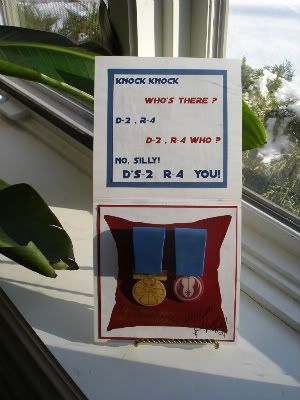
Through it all, Aidan, his brother and sister (Seth & Rachel), and Don & Darii have been troopers (I guess Aidan might say "Storm Troopers", since he is obsessed with Star Wars). Their faith has remained steadfast and they have served as an inspiration for others, sharing their experience (and struggles) on his Caring Bridge site.

I am told by Don & Darii that Aidan LOVES to get mail (don't all 7 year olds?), so I can't wait to hear about his reaction when he gets all these cards.

Shirley Clark has all the details on her blog HERE. You can also email her at shirley_clark@paperthreads.com to find out where to send your cards. She does ask that they be postmarked before January 29th!

If you have someone you would like featured for February, please send Shirley an email! A feature needs to be someone who needs cheering up. Maybe the person has lost a spouse, lost a loved pet, been in an accident, best friend moved away, found out they have a disease, etc.


Sunday, January 3, 2010

Let's get organized!

Okay, so I admit it! (that's the first step, right?) My scrap room is disorganized! I am trying to get back on track so I can use my things again...and first of, I wanted to get the ends of my Copic ciao markers labeled. I created a pdf with the numbers of each marker (in pretty tiny font - about 8 pt) and tried playing around with what media to print it out onto.
My first try was on the Georgia Pacific Cardstock I plan to use for stamping...but the cap on the markers has a little bit of a "domed" shape to it and the cardstock just couldn't mold correctly.
Take two was a sheet of waterproof polyester label designed for the laser printer. Ugggh! First of all it left "shadows" all the way down the printout even with the printer set to "label" so the fuser would be hot. I figured I'd try punching them out anyway...well, that was strike two for the label...it didn't punch evenly, in fact it "stretched" and tore around the edges.
I decided to settle for plain ole printer paper. Punched out the 144 circles, and used tacky glue to apply to the ends of the caps. Now I tried to be consistent and glue to the cap at the chisel end of every marker...but nobody's perfect...I think I have 3 or 4 on the brush ends, oh well! I swiped across the paper circle with the marker itself, so I have a little bit of an idea what the color actually looks like. Not as perfect a match as on cardstock, but good enough for me!
Here's a close-up of the yummy Copic goodness...


I think I'll try storing the markers in this Magpie cabinet that I picked up earlier this year at Big Lots for $3. I found that cutting a sheet of 8.5 inch chipboard in half fit nicely at a diagonal to divide the box into two halves for different color families.


How about you? What's your first mini goal for the New Year?

Friday, January 1, 2010

I'm finally playing with my Copics!

I got the Copic Ciao markers for Christmas and finally had a chance to get them out and play. I was coloring the Swiss Pixies Santa Birgitta stamp by CC Designs.

I tried two different ways of coloring using the same recipe...(btw...that's one of my next projects, to label the ends of the Ciao markers themselves!)


Here's my first take...

And then another version...

I think I like the second one best...it reminds me of my DD's round little tummy (especially after Christmas dinner!) What do you think?